


How do firefighters connect to a fire standpipe?
A fire standpipe is a critical component of a building's firefighting infrastructure, providing a vertical water supply system that allows firefighters to access water on multiple floors, especially in high-rise structures. Connecting to a fire standpipe efficiently and safely is essential for effective firefighting operations. Below is a detailed guide on how firefighters connect to a fire standpipe, including the equipment used, the steps involved, and best practices for ensuring a reliable water supply
1. Understanding Fire Standpipe Basics
Before connecting to a fire standpipe, firefighters must understand its components and design:
- Standpipe Types:
- Wet Standpipe: Permanently charged with water under pressure, ready for immediate use.
- Dry Standpipe: Filled with air and charged with water only when needed, typically used in unheated areas or buildings prone to freezing.
- Key Components:
- Piping Network: Vertical pipes (usually 2.5 inches or 63.5 mm in diameter) that distribute water throughout the building.
- Hose Connections: Standardized outlets (e.g., Storz or National Pipe Thread) where firefighters attach their hoses.
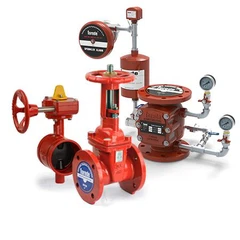
- Control Valves: Located at each floor to regulate water flow and prevent unauthorized use.
- Fire Department Connection (FDC): An external inlet where firefighters can connect pump trucks to boost water pressure.
2. Equipment Required for Connection
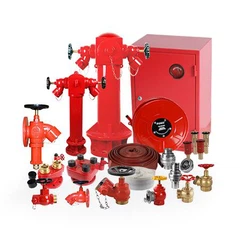
Firefighters need specialized equipment to connect to a fire standpipe:
- Fire Hoses:
- Attack Hoses: Lightweight, flexible hoses (typically 1.5 or 1.75 inches in diameter) used to direct water onto the fire.
- Supply Hoses: Larger-diameter hoses (2.5 inches or more) used to connect to the standpipe and transport water from the FDC or building supply.
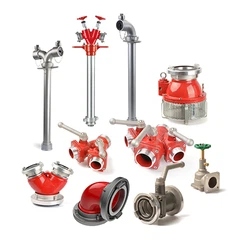
- Adapters and Couplings:
- Storz Adapters: For connecting to Storz-type hose connections.
- National Pipe Thread (NPT) Fittings: For compatibility with NPT-threaded outlets.
- Reducing Adapters: To connect hoses of different sizes (e.g., 2.5-inch hose to a 1.5-inch outlet).
- Wrenches and Tools:
- Spanner Wrenches: For opening and closing control valves.
- Pipe Wrenches: For securing hose connections.
- Personal Protective Equipment (PPE):
- Gloves: To protect hands from heat and sharp edges.
- Helmets and Face Shields: For head and face protection.
- Bunker Gear: Fire-resistant clothing and boots.
Step-by-Step Connection Process
-
Step 1: Locate the Fire Standpipe Outlet
- Identify the Nearest Outlet: Firefighters first locate the closest standpipe outlet, typically found in stairwells, corridors, or designated fire protection areas.
- Check for Obstructions: Ensure the area around the outlet is clear of debris, furniture, or other obstacles.
-
Step 2: Prepare the Hose and Adapters
- Select the Appropriate Hose: Choose an attack hose (for direct firefighting) or a supply hose (for connecting to the FDC or building supply).
- Attach Adapters: If the hose coupling does not match the standpipe outlet, attach the correct adapter (e.g., Storz to NPT).
- Inspect the Hose: Check for kinks, leaks, or damage before deployment.
-
Step 3: Connect the Hose to the Standpipe Outlet
- Open the Control Valve (if applicable): Some standpipes require opening a valve at the outlet before connecting the hose. Use a spanner wrench if needed.
- Secure the Hose Coupling: Align the hose coupling with the standpipe outlet and twist or lock it into place. Ensure a tight seal to prevent leaks.
- Tighten with a Wrench: Use a pipe wrench to fully secure the connection, especially under high-pressure conditions.
-
Step 4: Connect to the FDC (if needed)
- Locate the FDC: The FDC is usually located on the exterior of the building, marked with "Fire Department Connection" signs.
- Attach the Supply Hose: Connect the larger-diameter supply hose to the FDC using the appropriate adapter.
- Activate the Pump Truck: If the building's water supply is insufficient, firefighters may connect a pump truck to the FDC to boost water pressure.
-
Step 5: Test the Water Flow
- Open the Valve: Slowly open the control valve at the standpipe outlet to allow water to flow into the hose.
- Check for Leaks: Inspect the hose, couplings, and standpipe outlet for leaks. Tighten connections if necessary.
- Adjust Pressure: If the water pressure is too high or low, adjust the pump truck settings or use pressure-reducing valves (if available).
-
Step 6: Advance the Hose to the Fire Scene
- Deploy the Hose: Carefully lay out the hose along the floor or stairwell, avoiding sharp bends or obstructions.
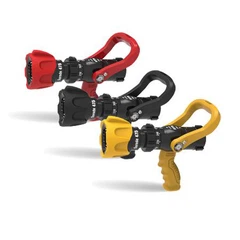
- Position Nozzles: Attach a nozzle to the end of the attack hose and adjust the flow pattern (straight stream, fog, or wide spray) based on the fire conditions.
- Coordinate with the Incident Commander: Ensure all firefighters are aware of the hose layout and water flow to avoid tripping hazards or hose damage.